How To Rip Athletic Tape In 5 Simple Steps
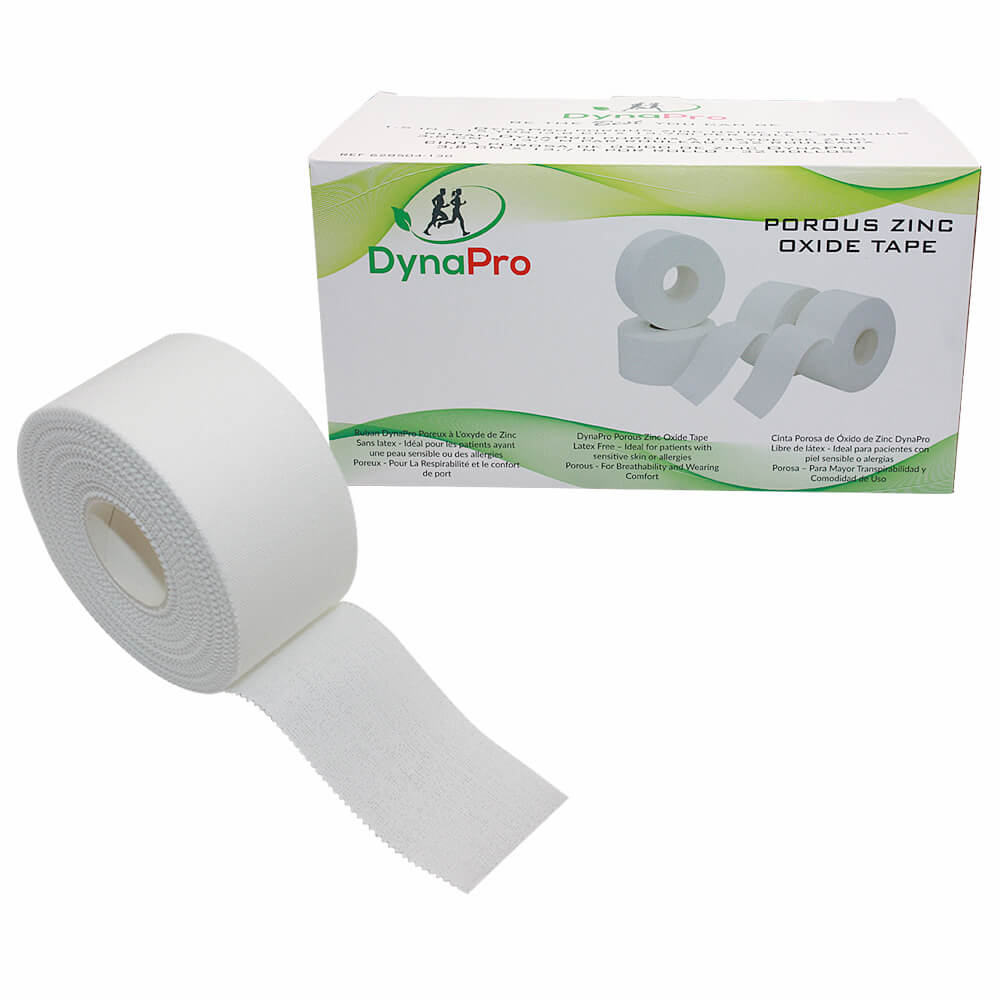
The first step in learning how to apply a tape job is learning how to rip athletic tape properly. This applies to both elastic tapes and non elastic (zinc oxide) tapes.
There are many ways to tear tape but with each of them, there are 2 important steps. First you need to practise the method sufficiently to become comfortable with it. Then (and this is not necessarily the same thing) you need to become efficient at applying your chosen method.
In this post, we present one widely used approach to tearing non elastic tape. Readers should feel free to make slight adjustments to this method to accommodate any individual preferences they may have.
You should first become proficient at applying this method to non elastic tape. Once this is achieved, you should be able to also apply it to light elastic tapes like DynaPro Stretchlight.
However, you should not be concerned if you are unable to apply it to heavyweight elastic tapes like Mueller Stretch M. Even experienced healthcare professionals prefer to use taping scissors such as Lister bandage Scissors to cut tapes such as these.
The technique presented below should not be used with k tape. With kinesiology tapes, it is better to use k tape scissors such as these from Mueller Sports Medicine.
Why Is It Important To Learn How To Rip Athletic tape?
You may be wondering why it is important to learn to rip athletic tape instead of just cutting it with scissors. The answer is that tearing tape, once learned correctly, will help to avoid the tape twisting and/or sticking to itself. The result will be less wasted tape and the ability to apply tape jobs more quickly and efficiently.
Step 1
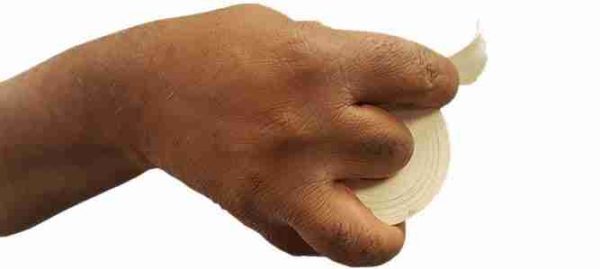
Hold the roll of non elastic tape in one hand. Insert the second finger of the hand through the roll to stabilize it. The roll should be balanced between the proximal joint of the finger and the palm.
Step 2

Place the piece of tape extending from the roll between the tips of the thumb and forefinger. Do this using the hand holding the roll.
Step 3

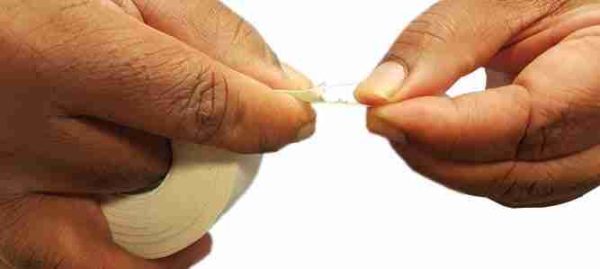
Hold the extended piece of tape between the thumb and forefinger finger of your free hand. Keep the fingertips holding the roll in each hand in close proximity to each other.
Step 4

Pull both hands in straight opposing directions. together with a slight downward motion. While doing this, apply pressure on the tape with your fingertips. You will begin to tear the horizontal fibres of the tape.
Step 5

As the tape begins to tear, move your hands as follows:
- Supinate the hand holding the roll (i.e. turn it so that the palm faces upwards); and
- Pronate the other hand (i.e. turn it so that the palm faces downwards).
Move both hands simultaneously and in a tearing motion. Try to avoid twisting or tearing the tape. With practice, you will be able to fully synchronize these two movements so that they are in effect a single motion. At this point, you will have learned one of the most popular ways to rip athletic tape.
How To Rip Athletic Tape : Summary
We suggest that you practice this method using non elastic tape. Once you have have learned how to rip athletic tape that is non elastic, you should also be able to rip light elastic athletic tape.
While tearing, keep the roll of tape in one hand only. This will save time, as it will avoid having to set the tape down and pick it up again repeatedly.
As mentioned above, tearing heavy elastic athletic tape by hand is difficult. You will need to vary your hand and finger positions on the roll of tape. In a future post, we will discuss how to vary your hand positions to tear heavy athletic tape.
